
Part 2 - Now on to the sewing!

Sew strips one through six together with a 1" white strip between each one and after fabric six. (You'll use 6 white strips).
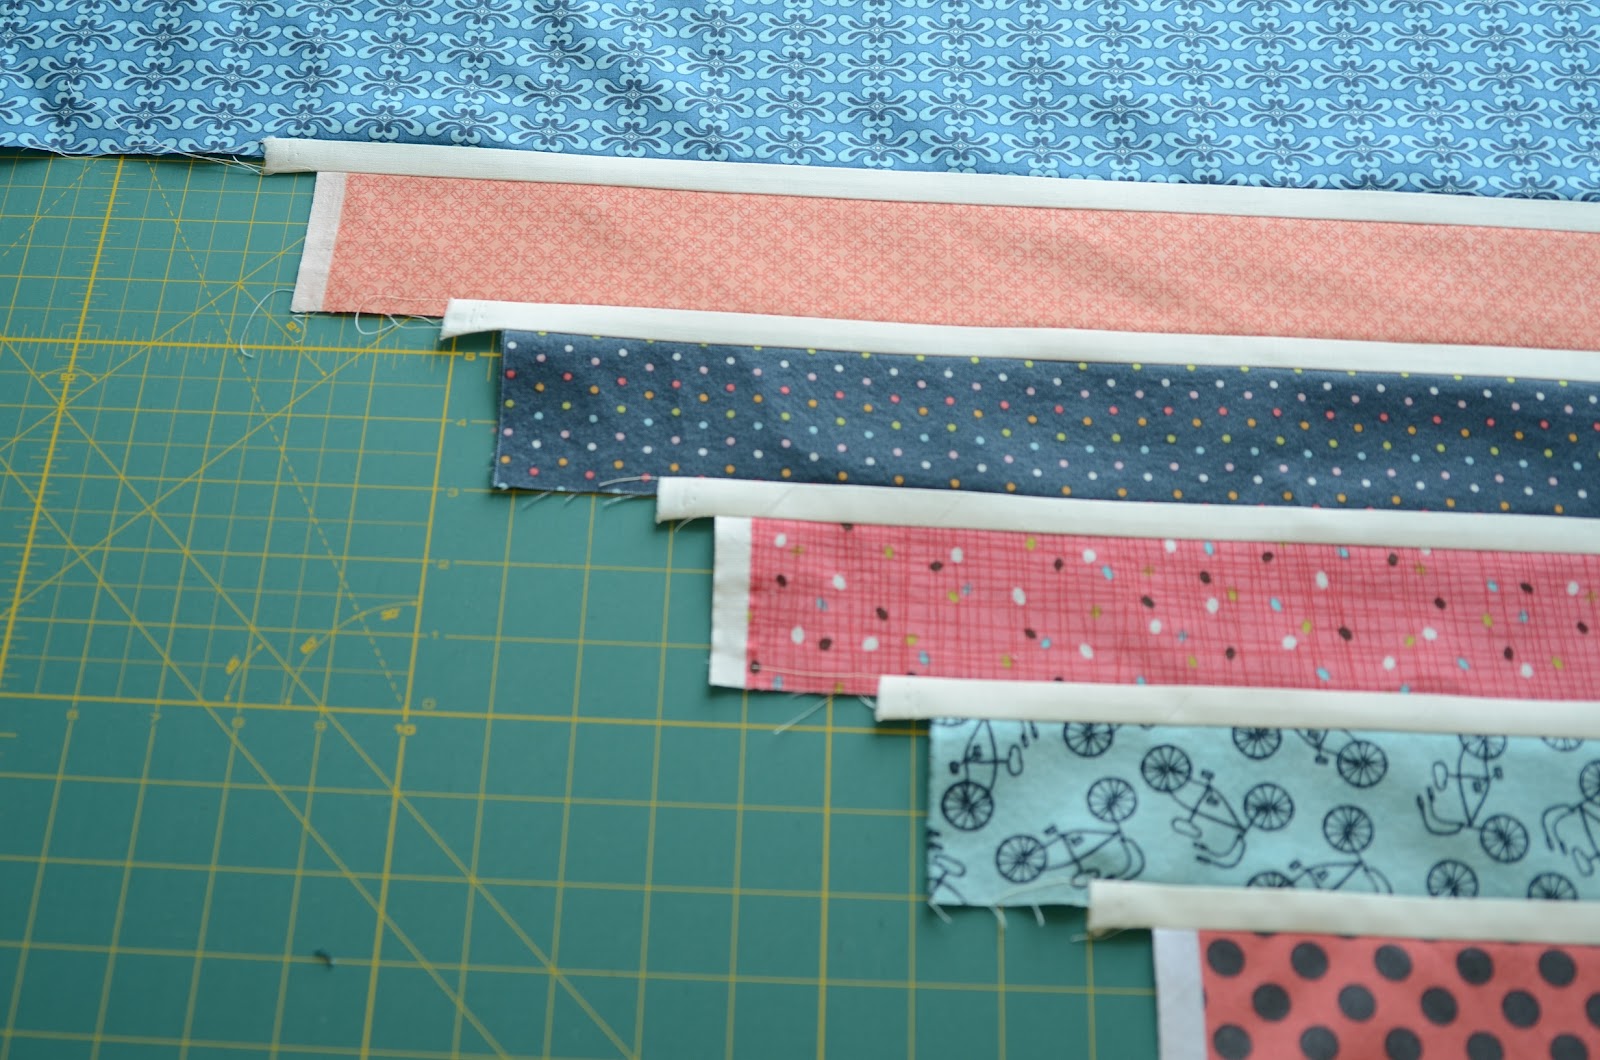
Stack the strips as pictured by sewing a 1" strip in approximately 4" from the short end of strip #1.
Sew strip #2 in approximately 1/2" from the end of the white strip.
Sew a white strip in approximately 2" from the end of strip #2.
Continue in this manner stacking 1/2" from the white strips and 2 " from the print strips.
End with a 1" white strip.
Press seam allowances toward the print strips.

Trim the edge by placing the 45 degree line of your ruler on any one of the seam lines.

Trim off the ends. You may have to move your ruler a bit for the length.

Cut a strip 4 1/2" wide from the clean cut edge. Repeat and cut 3 more for a total of four. Check the angle of each strip with the 45 degree line on your ruler. You may have to trim this up again as the bias edge relaxes and may not be a true 45 anymore.

You will have 4 units that look like this!

Tip: Your rows have bias edges which are very stretchy! Handle them carefully, trying not to stretch the edge.
Repeat the same technique with the second strip of fabrics one through six, stacking them in the opposite direction. Press these seam allowances toward the white strips.
Trim the edge using the 45 degree line.

And cut 4 units at 4 1/2" from the cut edge.

Repeat the same steps from above with fabrics seven through twelve and five 1" white strips. Sew a white strip between each of the print strips stacking as above (you'll start and end with a print strip this time).
You can see that we created the rows in two units instead of one long strip set. This is because the whole strip set would be too long for your cutting mat. Now we have to sew them together.
Pin and sew the left side units with fabrics 1-6 to the left side units with fabrics 7-12. Because of the angle there will be a small triangle hanging off each end. The "V" formed where the fabrics meet will be right at the 1/4" seam allowance.
Join the right side units in the same way.

Sew the right side units to the left side units. You'll notice that with the seams pressed in opposite directions, they match up nicely. Pin at each intersection. Sew the center seam, being very careful not to stretch the bias!

Make four of these rows.

I think that's enough for today! Next we'll assemble the quilt top!


Way cool! Do you think this technique would work for a quilt with different width chevrons mixed together?
ReplyDeleteAbsolutely! I'll bring that up on Thursday!
Deletejust wondering about your measurements. looking at this, you say to sew the first white strip in 4" from the end of the first print strip. this seems a bit far, as the strips are only 5" long?
ReplyDeleteany thoughts?